Well, this was a big project, taking up a large chunk of my Easter weekend.
I grew tired of listening to the dashboard rattle and squeak with minor road disturbances and my daughters who normally drive this car confirmed that this nuisance bothered them as well. At first I thought it was due to deteriorated cushions in the dash top cover or pad. So I removed the top pad and found no real cause of squeaking or rattling, such as a worn foam strip. This was also my last chance to do anything big before one daughter soon returns from her semester abroad, as the car would be un-driveable for a few days.
Dash pad/cover removed to look for looseness/squeaks.

Did a little research online and learned that the 850 has a very common problem with the front dashboard mounts failing, resulting in the whole front of the dash to be loose. That’s what causes all the rattling and squeaking. This was verified on this car when I found I could move the whole dash freely front to back with the pad off, meaning the front bolt mounts were completely broken free.
So I removed the dash entirely to find what I expected: the front mounting tabs (nut retainer plastic) had torn away completely from the dash assembly.

Front mount broken off, remained in place when dash was removed.

One mount completely ripped out of dash, leaving gaping hole.

All four mounts broke and stayed behind on chassis when dash was removed.
Fortunately the mounts were somewhat intact, not shattered into many small pieces as some people find. This meant a relatively easy repair, and I adapted fixes as suggested by several people in Volvo forums. Repair was easy but getting the dash out and re-installing is quite an ordeal.
First I used cyanoacrylate (Super Glue) to secure the broken plastic mounts back into place.

Super-glued mounts back into position as best as possible.

Then I applied epoxy putty to the broken joints for a stronger bond. These two steps are intended only to get and keep the nut in position temporarily; they are not expected to hold firm.

Putty epoxy used to further secure mounts in place.

Then I screwed a short length of metal pipe strap over the mounts to create the new fastener. The repaired mount now consists of the strap secured to the dash with the nut captured underneath. Located the large holes directly over the nut thread.

Metal pipe strap screwed into dash forms new mount.

Repair looks cheesy but it is solid and really works.

All four mounts created by strapping over nuts.

Verified mounting screw cleanly passes through metal strap in all four positions.
Re-installed the dash and was pleasantly surprised that all four repaired mounts held together and I was able to tighten them all down. I was going to be happy with only three solid ones and settle for two. Four is just totally sweet!
Update 4/24/14:While others have concerns about the exact positioning and contour of the strap, I found it was not critical. The strap was loosely wrapped around the mount shape in some cases. Also had no trouble getting the long bolts to line up with the captive nuts. For those who are curious, I used #8 truss head self-drilling screws, 1/2″ long, using care not to over-tighten them and strip the plastic. I verified strength by prying hard under a couple of straps to make sure the screws would not rip out easily. If the screws were to pull out, I would use blind rivets to secure the straps instead.
After the dash was mounted back in place I re-installed the dash pad and put everything back together.
No more rattling or squeaking now.
The process of removing the dash pad and dash is too involved to detail here. Here is a look at everything removed for this procedure:

Everything removed for this repair. Quite a task.

A load of parts removed.
An experienced person can probably do this task in one long day. I spent parts of three days to do it all.
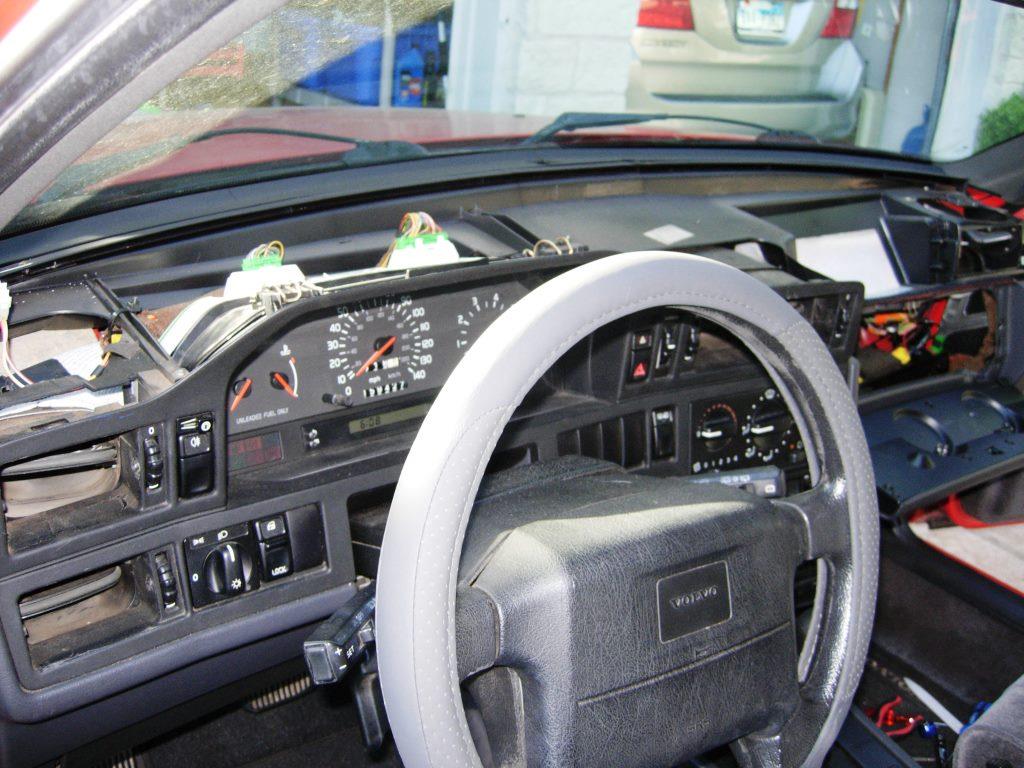
Strange to see the car with the whole dash removed:

Entire dash removed as seen from left side…

…and right side.
Technically you can remove the dash with the dash pad/cover in place but it is that much heavier and hard to maneuver if you leave it on.
Update 4/24/14: The dash pad plastic is now so old and brittle almost any disturbance of it is sure to cause damage beyond what is likely already underneath. This one had a lot of big cracks and chunks broken off. In addition it is difficult to get these back into place properly, especially at the right corner above the center vents. I would recommend not removing the pad/cover unless needed for other repairs.
Also, if your air conditioning evaporator is leaking (common problem), this is the best time to replace it because dash removal is required for that repair as well.
When removing and replacing the dash, use caution around the shift knob. I tore this one up by scraping the dash over it. Better to move the knob back out of the way if you can’t be extra careful.

Tore shift knob up when replacing dash. It’s OK because it was crusty and gummy and I have intended to replace it anyway.
$0- No cost beyond some glue, weld and pipe strap, which I had around the house.

April 21, 2014 at 1:52 am |
You are my hero!
April 22, 2014 at 9:28 am |
Wow! I replaced the dash pad on my Daughters 850 and thought that was an accomplishment. It was a walk in the park compared to this repair.
September 7, 2014 at 2:15 pm |
Hi Jim,
I really like the blog you’ve done here, I recently bought a 95 Turbo saloon that was in an accident 10 years back. While the frame and engine compartment are in good order, the dash was horribly botched. I’ve been trying to find some kind of manual or something explaining how the whole thing disassembles, I’m not sure if you’d be willing to email me how you did it I’d really appreciate it, I’ve been stuck at this since I bought the car,
Thanks,
Reilly
September 7, 2014 at 2:16 pm |
OK, Reilly, I will actually share some details here in the comment and also email them separately.
For removing the dash pad, the best tutorial I’ve found is here: http://www.atthetipwebs.com/technologyinstructions/dash_pad_removal_volvo_850.htm
An excellent video covering the same topic is on Robert’s YouTube channel: https://www.youtube.com/watch?v=9TuW283v-xQ
As for the dash itself, the best writeup I’ve found is here: http://www.woodjoiner.com/volvo/ It is for replacing the AC evaporator but the steps on removing the dash itself are required for that task so it’s valid.
Robert also has this task documented in video form: https://www.youtube.com/watch?v=ODwxmHMm9Wk
Hope this helps!
Jim
March 23, 2015 at 1:36 pm |
Hi Jim,
I’m thinking about tackling this repair soon as my dash has gotten so noisy I am starting to hate driving my favorite car (96 850R). A few questions for you:
Is the repair still holding?
Have any squeaks or rattles come back?
Is it possible to partially reassemble the car (steering wheel and other parts) to enable me to drive the car with the dash removed? This is my only car at the moment and I need it to get to work and home every day.
Thanks,
Mike
March 23, 2015 at 1:49 pm |
Hi Mike,
Repair is still holding strong. Should be better than original, actually since we added metal to replace plastic.
Squeaks and rattles now are from a poor job re-installing the dash pad (top cover). I need to look into that and tweak a bit.
It would be technically be possible to make the car drivable without the dash assembly but it would be kind of crazy and maybe not safe. Super ugly; look at the disassembly pictures on my post. A lot of duct tape and cable ties holding things in place, maybe? Main concern is the instrument cluster and the climate control, plus all the dash switches.
Personally I would not consider it. Just do the work when you had the time (call in sick one day?)
Jim
June 22, 2015 at 3:37 pm
Hi Jim,
Thanks for the encouragement to get this done. I booked the past weekend to doing it and completed the job in about 17 hours total. I had to do a lot more repairing than just the 4 main mounts as the plastic at the lower mounts was disintegrated along with a bunch of other areas. I used the v1 and v2 instructions from Ozark Lee over at MVS to build some supports that were a hybrid of his 2 versions. It was a lot bigger job than I thought, but my silent drive to work this morning made it all worth while.
Mike
June 24, 2015 at 10:22 am
Way to go,Mike!
Rather scary to have your car torn apart like that, isn’t it? But as you learned, it makes a big difference.